There are many practical applications for ChatGPT with a low-code development tool like FileMaker. We've explored a chatbot, image generator, and audio transcription ChatGPT integration with FileMaker. We've also shared an example of using ChatGPT to summarize our notes.
We want to explore how integrating FileMaker and ChatGPT via Claris Connect works. Though not necessarily ideal, we'll use an annual performance review as the foundation for our example. Of course, performance appraisals are highly individualized, so artificial intelligence isn't recommended, but most people can relate to this process's fundamental objectives and structure. We will use it as a simple case to demonstrate the workflow and results.
Storytelling with ChatGPT
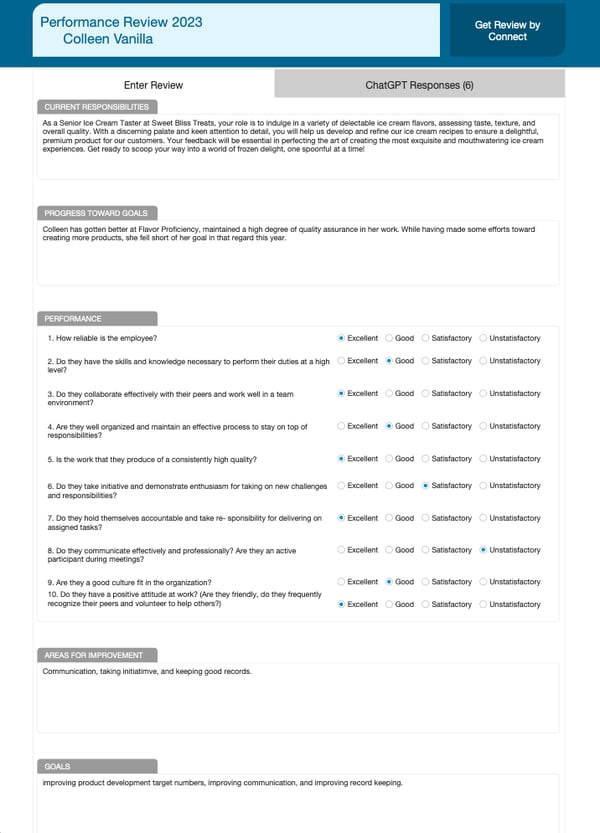
Let's say an ice cream company called Sweet Bliss Treats has asked us to create a system to help their managers write formal performance reviews. We've created a form with questions for them to complete. Managers are responsible for inputting the essential information for their yearly reviews in this form. Then, ChatGPT will take that basic information and write a formal and detailed appraisal. Here's an example of this form for Colleen B. Vanilla, the Senior Ice Cream Taster at Sweet Bliss Treats.
You'll notice that the manager doesn't have to put much effort into articulating their feedback, just hitting the highlights of the performance.
Hopefully, you've registered for a ChatGPT account and connected your account to FileMaker via an API key. It's relatively quick and painless if you haven't gone through this process yet. All you need to do is copy the secret key from ChatGPT and paste it into your FileMaker file. For more details and a sample file, review our blog post about how to use ChatGPT and FileMaker.
Having filled out the information on Colleen, our manager would like ChatGPT to create a detailed narrative to give her. Clicking on the button "Get Review by Connect" will submit a request to ChatGPT via Claris Connect to create that narrative for us.
Claris Connect
Claris introduced Connect to streamline integrations between FileMaker and other widely used applications, such as Slack, HubSpot, MailChimp, etc. It's an intuitive, no-code solution for users looking to automate workflows across their technology stack. A drag-and-drop interface guides users through connecting different applications and configuring actions based on certain circumstances.
Creating an Account
You'll need to go to connect.claris.com to create an account. New accounts are free now, so we have access to unlimited active flows and all standard connectors. The only limitation is the number of flow steps we can activate each month – the free tier is limited to 500 per month. This threshold is sufficient if we only have to execute a straightforward flow once a day.
Creating a Project
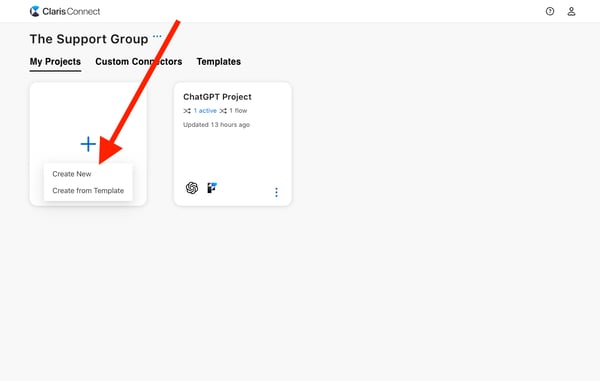
The next step is to create a Project. Projects organize our various flows, allowing us to separate them into different buckets. Think of them like folders – an organizational tool, mainly. We may have one project per FileMaker file or one project per department. We'll get a drop-down menu when we hover over the plus sign icon in the Projects view. Select "Create New."
Creating a Flow
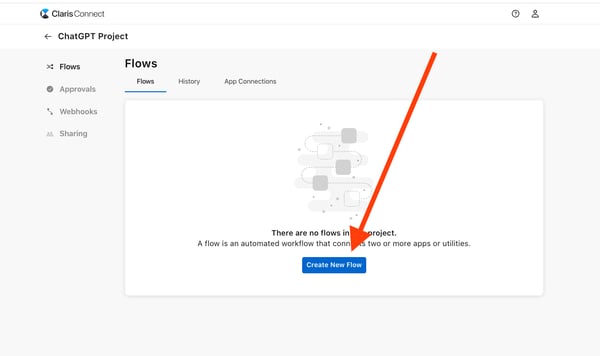
On the detail page, click "Create New Flow."
Configure Flow – Overview
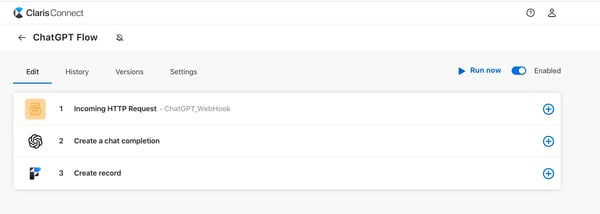
Our Flow will have three actions:
- A webhook Action (the trigger)
In the FileMaker script, we will send two values to Claris Connect via the Trigger Claris Connect Flow script step: the primary key of the review and the prompt we want to submit to ChatGPT. - A ChatGPT Action
The action will take the prompt we submitted to the webhook and generate a narrative based on the prompt. - A FileMaker Action
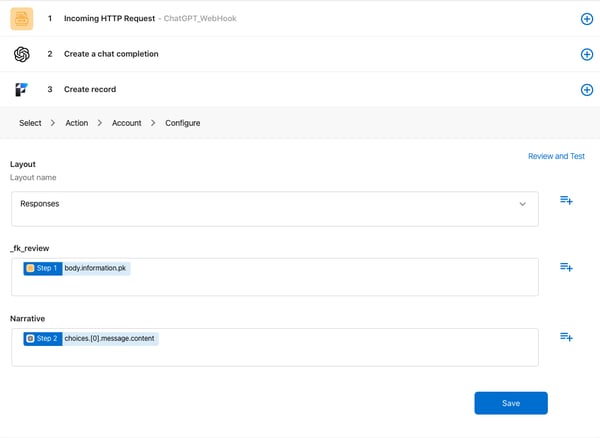
Using the primary key submitted with the webhook, we will create a new record in the Responses table and set the foreign key to link the responses and review.
Our Flow will look like this when it's complete:
Step 1: WebHook Action
The trigger is the kickoff for the entire process. It will start the flow and allow us to transfer data from our FileMaker file to Claris Connect. Once we click "Create New Flow," we will see a list of the standard connectors. Please note that since this is the very first step of the flow, many of the items will not be available for selection. Only specific connectors can initiate a flow; only those connectors are available to us in the first step. The rest will be available as we progress.
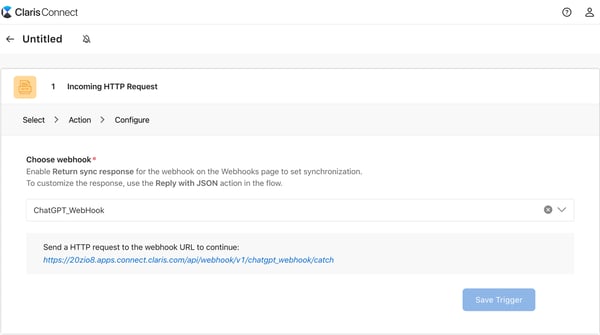
We'll select the connector labeled "HTTP" as our first step and then click "Continue" on the bottom right. If there are existing webhooks, we can select one, but Claris Connect will create a new one with whatever name we enter.
Claris Connect will test whether the webhook will work, so we click the blue link that says, "Send an HTTP request to the webhook URL to continue." A new tab in the browser will open with a default JSON response. Close that and go back to the original tab. Notice that the "Save Trigger" button is an option for us now, so let's click it.
After that, we will do something counterintuitive: send the call from FileMaker to Claris Connect now instead of when we're done. We’re doing that because, in later steps, we will need to know what data points we're sending with the flow, but Claris Connect won’t know that until FileMaker triggers our new flow and sends the data.
Since the flow can’t be enabled yet, we’ll manually copy the http request listed in the webhook. Based on our example, it is:
https://20zio8.apps.connect.claris.com/api/webhook/v1/chatgpt_webhook/catch
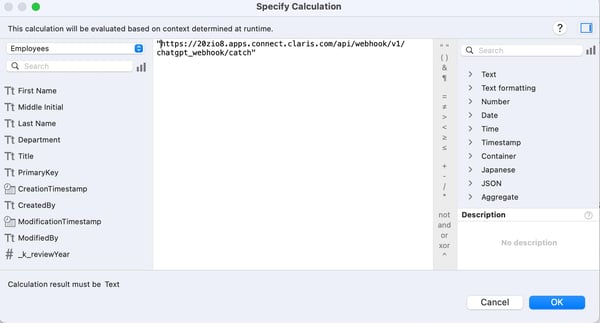
Next, let's go into our FileMaker solution and paste this URL into the Trigger Claris Connect Flow script step.
Note: your URL will be slightly different than this one, as it comes from your Claris account, not ours.
Now, save and run the script. It will likely fail. However, it doesn't matter because calling the webhook once provides Claris Connect with the list of data points we'll use in the rest of the flow. And it will use those data points to return a detailed narrative to the record from ChatGPT.
Step 2: ChatGPT Action
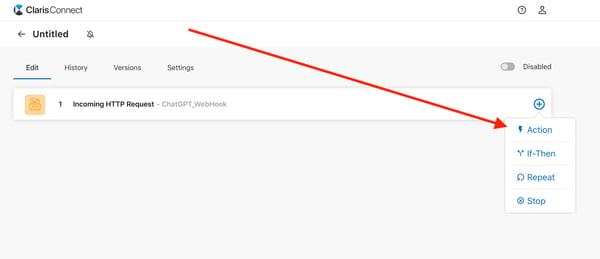
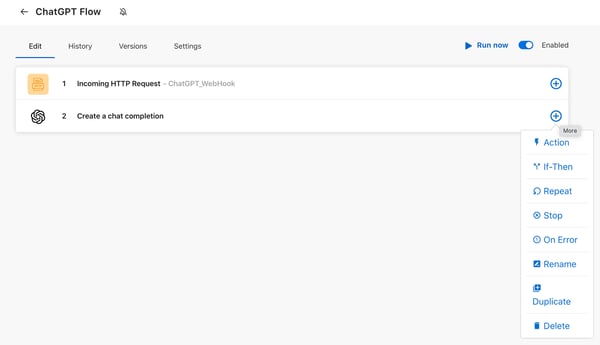
When we click the plus sign to the right of the first step, we'll see a pop-up menu with a series of items. Let's click the "Action" button.
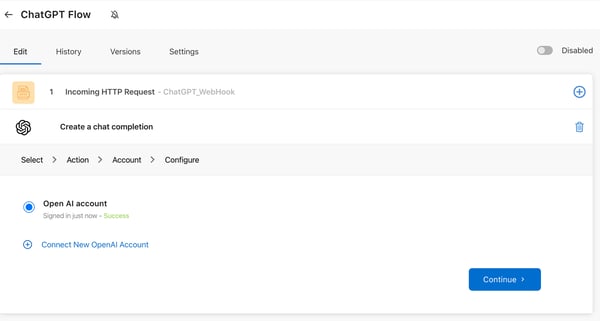
We must specify a connector for this new action. Find the "OpenAI" connector and select it. Notice that all the connectors are now available to us since we initiated the process.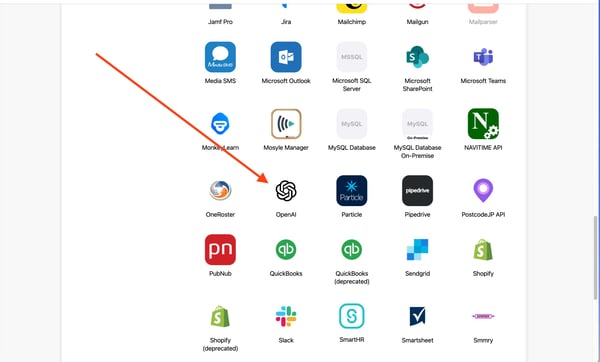
We must stipulate what we want to do, so select "Create a chat completion."
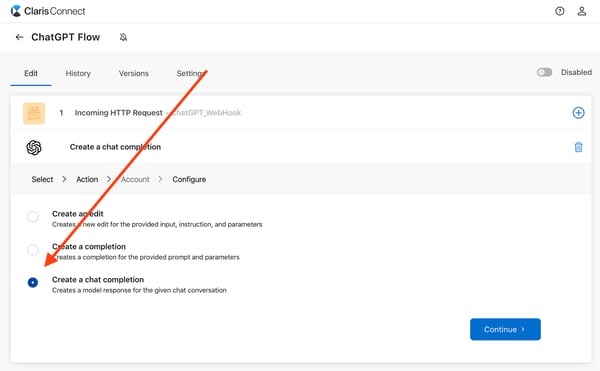 Next, we sign into the OpenAI account by inputting an API key from ChatGPT. See our previous blog post about how to generate an API key. Enter the API key, click sign in, and continue to the next step.
Next, we'll need to select the model the connector will use. Select gpt-4.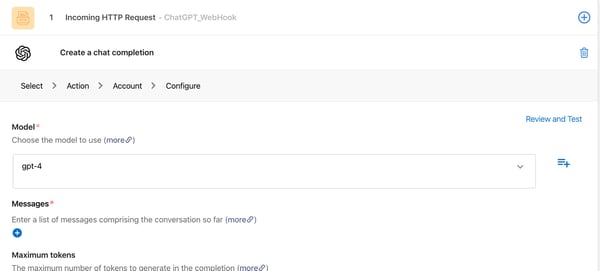
After that, click the blue plus button below messages and select "User" in the "Role" text box.
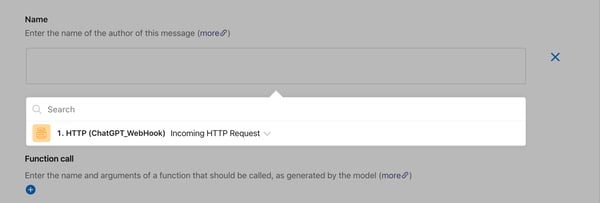
Click the blue plus button on the "Content" text box and select the webhook.
It will expand to show the JSON array that FileMaker submitted to the webhook. Scroll down and select the "Content" object.
 Everything else can be left blank here. After we get it working, we can play with some of the options to see how they affect the results.
Step 3: FileMaker Action
We will ask FileMaker to create a new record in the Responses table and set the foreign key field within the table to the primary key's value, thereby linking the new record with the respective review form.
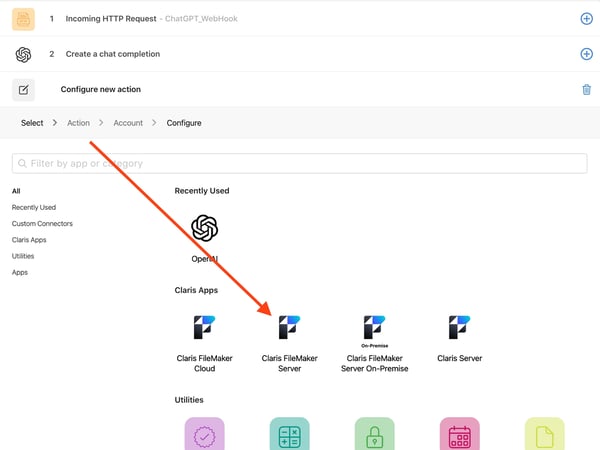
We'll get started by clicking the blue plus sign in step 2 to create the third step.
Click "Action" and select the "Claris FileMaker Server" option.
Choose the "Create record" option and hit continue. 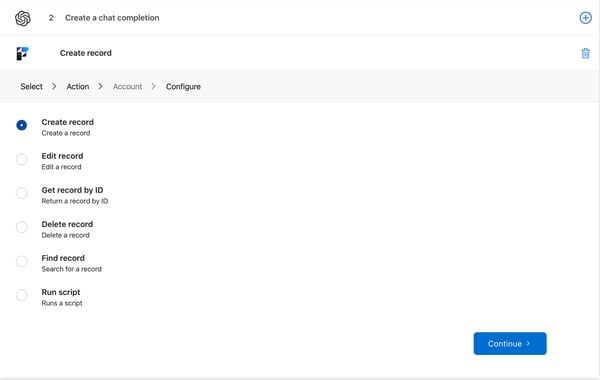
Now, we have to sign into the FileMaker server. We will need to provide the following details about the database where we'll store the new record:
- the domain or name of the server
- username
- password
- the name of the database
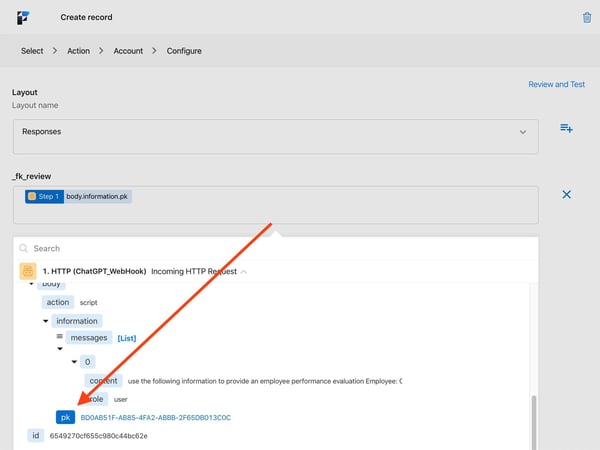
It's best to gather all this information beforehand to avoid delays because autofill does not apply here. When done, the screen should look like this: After we click continue, we must specify a layout name; in this case, that's the "Responses" layout. Once we designate the layout, the associated fields dynamically populate. In step one, we want to set the "_fk_review" field to the review's primary key value submitted via the webhook.
Click the plus button to the right of that field, select the webhook from the list of options, and then select the "pk" object from the JSON array. It's directly below the "content" object we set in step two.
We should also see the "Narrative" field as an option in this connector. Let's click that and select the OpenAI connector as the source. We'll scroll until we can choose the "content" object.
Click Save at the bottom.
To test this workflow, we'll complete the review form using the TSG ChatGPT Performance Review sample file and click "Get Review by Connect." ChatGPT may take a little while to process the request, and then we'll receive a detailed rendering based on our responses to the appraisal questions.
Using our example about the Senior Ice Cream taster, Colleen Vanilla, here's one response that ChatGPT returned. We'll receive different results every time we click submit, as would happen within the ChatGPT interface.
Employee Performance Evaluation
Employee: Colleen Vanilla
Title: Senior Ice Cream Taster
Colleen, as a Senior Ice Cream Taster, has consistently exhibited high standards of quality and reliability in her role. Her proficiency in flavor discernment shows marked improvement and she maintains an unwavering commitment to quality assurance in her work. She is excellent at collaborating with her peers and contributes positively to the team environment.
In the area of organizational skills, she has been rated as good. She produces consistently high quality work, resulting in delightful and refined ice cream recipes that have garnered positive feedback from customers.
In terms of taking initiative and demonstrating enthusiasm for new challenges, Colleen's performance is satisfactory. Although she has displayed effort in taking on new responsibilities, she fell short of her goals this year in terms of product development, suggesting a need for improvement in this area.
With regard to communication, it is observed that Colleen's proficiency needs significant enhancement. Her active participation in meetings has been found lacking, thereby impacting her professional communication. Similarly, her record keeping could benefit from improvements.
Colleen is indeed a great fit for the organizational culture with a positive attitude that resonates well at the workplace. Her friendly demeanor, readiness to acknowledge her peers and willingness to aid others earn her excellent marks in this category.
Looking towards the future, the top three goals that Colleen should aim for include: improving her product development performance, enhancing her communication skills, and refining her record-keeping process. By addressing these areas, Colleen can significantly contribute to the growth and development of Sweet Bliss Treats.
Overall, Colleen's performance as a Senior Ice Cream Taster is admirable, with a notable opportunity for growth and enhancement in certain functional areas. With a little effort and focus, she can reach her full potential and bring exceptional value to her role.
Again, the manager will likely have to edit the narrative, but it's a good starting point. The solution will track multiple responses provided by ChatGPT so we can take the best parts from a few different responses and adjust them to our liking to create our own custom narrative. This example shows how ChatGPT can save us time and effort if used ethically.
Integrating Claris Connect with ChatGPT opens up exciting possibilities for the future of automation and conversational AI. As both platforms continue to evolve and improve, we can expect to see new features and innovations that further enhance their capabilities.
This article is also published on FileMakerProGurus.com.

